
 TerraPlan
 overview and the screen layout
What TerraPlan does and where everything sits on the screen, from the tool rail to the number pad.
TerraPlan is the drawing and estimating program in Terralox. You measure the house, draw the foundation and rooms to scale, mark readings, cracks, piers and repair zones, and turn the drawing into an estimate, a proposal and a crew install sheet. It runs in the browser on an iPad, a phone or a laptop. Open it at /terraplan/app or from My programs on your account page.
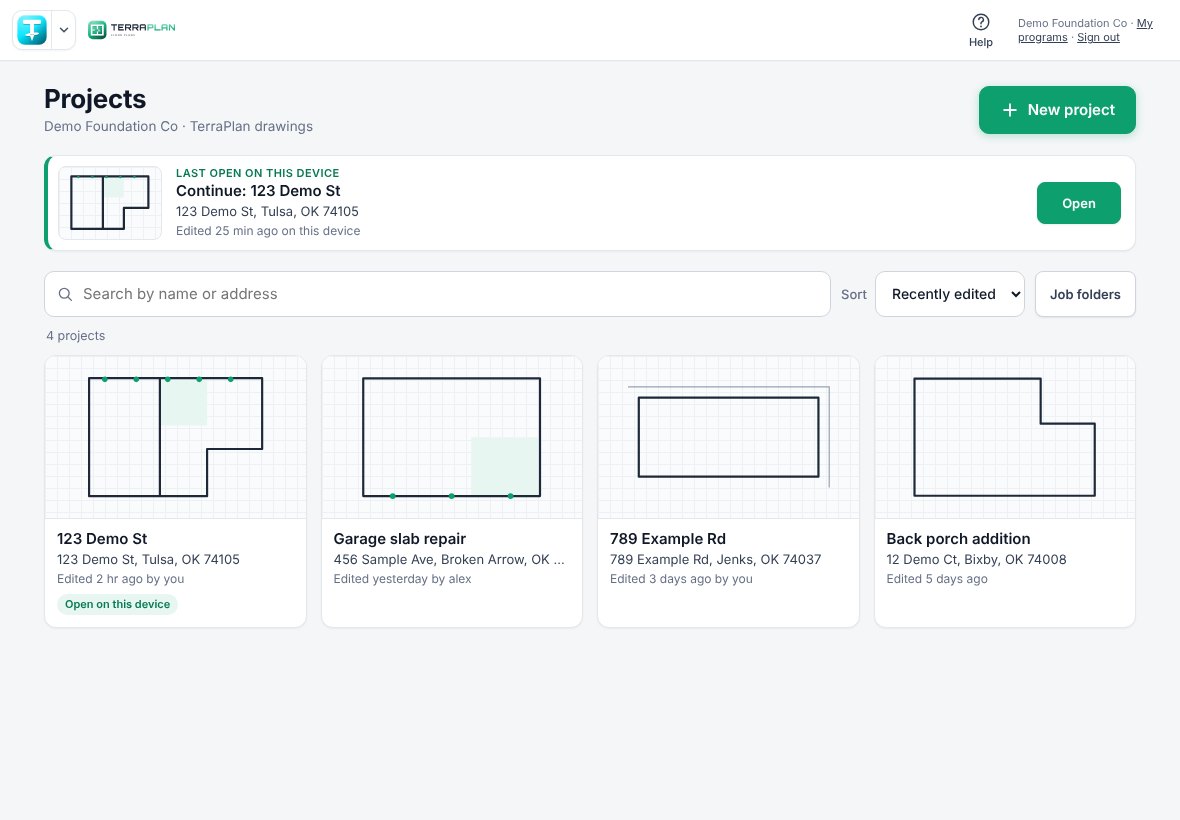
TerraPlan opens on the Projects screen, like ArcSite: tap + New project, or search for a project and tap its card to open the drawing. See Start a new plan.
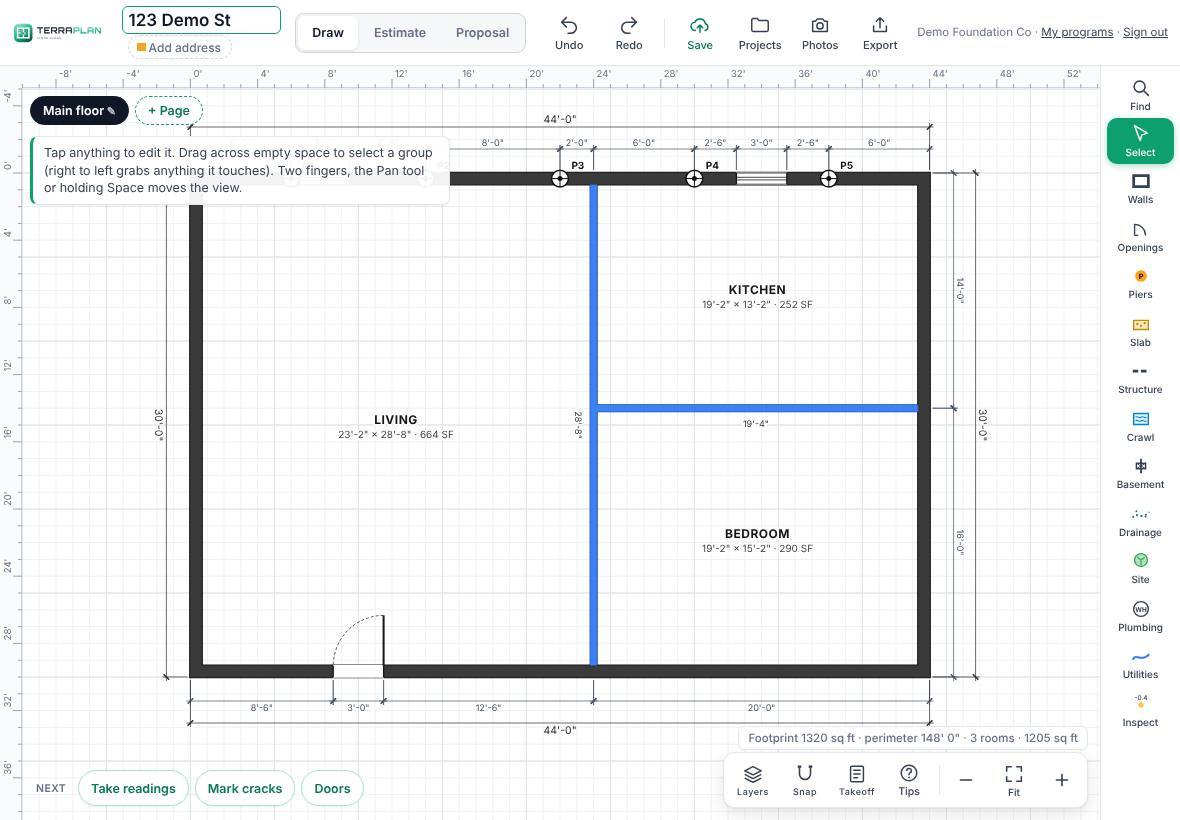
The parts of the drawing screen
- Terralox button (far top left). Goes to the terralox.com home page. Tap the small arrow next to it for My account, Jobs, your other programs, the Help Center and Sign out.
- Top bar. The plan name and its address folder, then Draw, Estimate and Proposal. On the right are Undo, Redo, Save, Projects (back to the Projects screen; your changes are saved first), Photos (opens TerraCam on this plan), Export and Help, which opens these help articles. On an iPad held upright and on a phone these buttons show icons only.
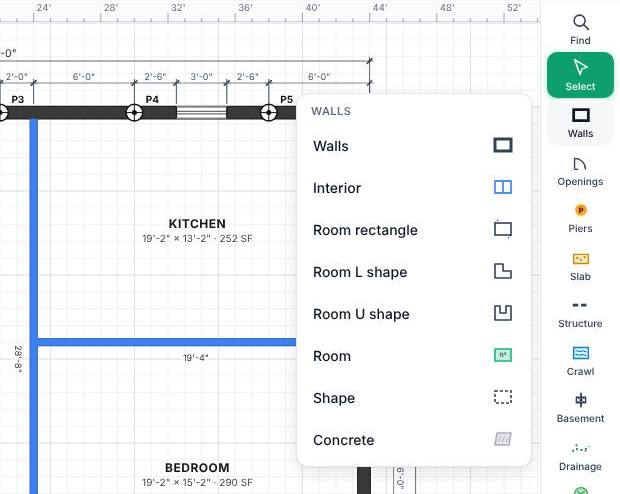
- Tool rail (right side). One button per group: Find, Select, Walls, Openings, Piers, Slab, Structure, Crawl, Basement, Drainage, Site, Plumbing, Utilities and Inspect. Tap a group to open its list of tools with names. Once you pick a tool, the list folds into a slim column of icons so you can switch with one tap.
- Pages (top left). Main floor plus + Page for a crawl space, basement or site plan.
- Tips (top left). A short line that tells you what the current tool does. If it would cover part of your drawing, it shows for a few seconds after you pick a tool and then gets out of the way as soon as you tap the plan. Tap Tips at the bottom to hide or show it.
- Selection column (left side). When something is selected you get Copy, Turn 90°, Offset, More, Lock, Edit and Delete. Edit opens the details panel on the right, for one item or for several selected together.
- View bar (bottom right). Layers, Snap, Takeoff, Tips, zoom out, Fit and zoom in.
- Next (bottom left). Shortcut buttons for the usual next step, such as Draw the outline, Label rooms, Take readings or Estimate ›. When a bar opens along the bottom (pier types, the level bar, the drawing bar), Next and the view bar move up above it.
- Totals (bottom). Footprint, perimeter, rooms and the reading spread.
How a typical job goes
- Tap + New project and enter the job address.
- Draw the outside walls, then interior walls, doors and windows.
- Label rooms, take floor readings and mark cracks.
- Place piers and draw repair zones.
- Switch to Estimate, check the prices, then open Proposal.
- Use Export for a PDF of the plan or the crew install sheet.
Thanks for letting us know.
Still need help?
Send us a message and a real person on the Terralox team will get back to you, usually the same business day.